This blog is to describe how to setup the asset tracker and run the demo on nRF9160 DK board.
I would show how to compile image and connect the nRF Cloud for data communication.
Prerequisite
You have follow all the steps to setup the development environment. If no, you can refer to
https://jimmywongiot.com/2019/12/18/step-by-step-on-nordic-connect-sdk-for-development/
https://developer.nordicsemi.com/nRF_Connect_SDK/doc/latest/nrf/getting_started.html
nRF9160 DK Getting Started
This guide will help you get started with your nRF9160 DK. Before you start developing your own application, you should update the firmware (both the application firmware and the modem firmware) and the certificates of the Development Kit (DK) and conduct some initial tests.
The nRF9160 DK is a hardware development platform used to design and develop application firmware on the nRF9160 LTE Cat-M1 and Cat-NB1 System in Package (SiP). See nRF9160 DK Hardware for detailed information about the DK.
The DK is preprogrammed with the nRF9160: Asset Tracker application, which simulates sensor data and transmits it to Nordic Semiconductor’s cloud solution, nRF Connect for Cloud. Both the Asset Tracker application and nRF Connect for Cloud are constantly being improved. Therefore, you should update the application and the modem firmware before you start working with the nRF9160 DK.
https://infocenter.nordicsemi.com/topic/ug_nrf91_dk_gsg/UG/nrf91_DK_gsg/intro.html
Requirement:
- NRF9160 DK board
- NRF Connect SDK v1.3.0
nRF9160 DK Hardware
Basically, you can also refer to the nRF9160 DK User Guide document.
https://infocenter.nordicsemi.com/pdf/nRF9160_DK_HW_User_Guide_v0.9.3.pdf
The nRF9160 DK is a hardware development platform used to design and develop application firmware on the nRF9160 LTE Cat-M1 and Cat-NB1 System in Package (SiP).
The Development Kit (DK) includes all necessary external circuitry like a SIM card holder and an antenna and it provides developers access to all I/O pins and relevant module interfaces.Note: The DK can be connected to a base station by the onboard LTE antenna or to an LTE emulator by an RF cable. See our nRF9160 certifications webpage to find the bands supported by the LTE modem. Without a UICC/SIM connected, the DK cannot initiate communication with the LTE network.
The key features of the DK are:
- nRF9160 SiP
- LTE antenna that supports all bands supported by the SiP
- Global Positioning System (GPS) antenna
- nRF52840 as a board controller and network processor for Bluetooth® and IEEE 802.15.4 protocols
- Buttons, switches, and LEDs for user interaction
- I/O interface for Arduino form factor plug-in modules
- SEGGER J-Link OB Debugger with debug out functionality
- UART interface through virtual COM port
- USB connection for debug/programming and power
- SIM card socket for nano-SIM (4FF SIM)
- Interfaces for nRF9160 current consumption measurements
Hardware Information
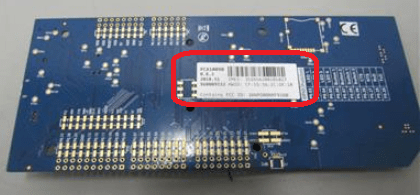
You can find all the IMEI and HWID information at the back of the nRF9160 DK board.
nRF9160: Asset Tracker
The Asset Tracker demonstrates how to use the nRF Cloud to connect an nRF9160-based board to the nRF Cloud via LTE, transmit GPS and sensor data, and retrieve information about the device.
Overview
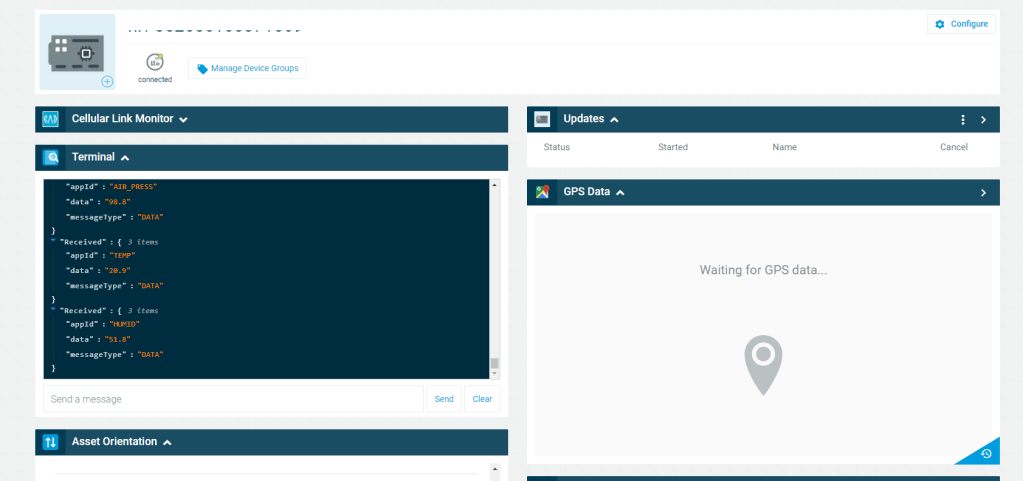
The application uses the LTE link control driver to establish a network connection. It then collects various data locally, and transmits the data to Nordic Semiconductor’s cloud solution, nRF Cloud. The data is visualized in nRF Cloud’s web interface.
The collected data includes the GPS position, accelerometer readings (the device’s physical orientation), and data from various environment sensors.
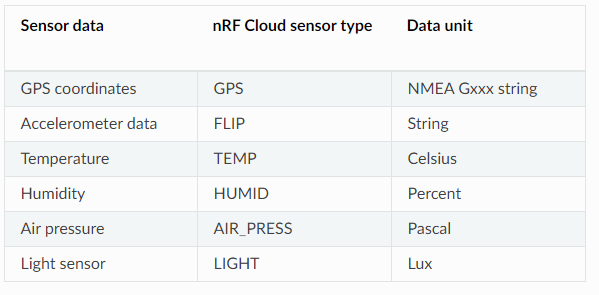
On the nRF9160 DK, the application uses simulated sensor data by default, but it can be configured with Kconfig options to use real sensors to collect data. On the Thingy:91, onboard sensors are used by default. GPS is enabled by default on both the boards.
In addition to the sensor data, the application retrieves information from the LTE modem, such as the signal strength, battery voltage, and current operator. This information is available in nRF Cloud under the section Cellular Link Monitor.
The LTE Link Monitor application, implemented as part of nRF Connect for Desktop can be used to send AT commands to the device and receive the responses. You can also send AT commands from the Terminal card on nRF Cloud when the device is connected.
By default, the Asset Tracker supports firmware updates through AWS FOTA.
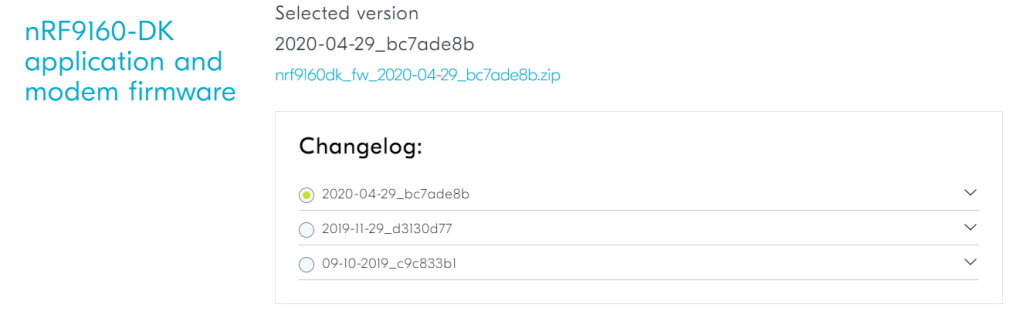
Program the application model firmware
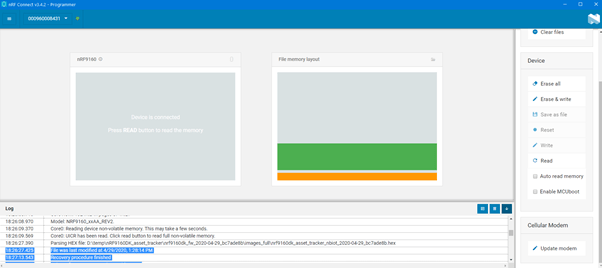
In this case, the HKCSL operator is not supported the ePCO mode. I used the hex as below
nrf9160dk_fw_2020-04-29_bc7ade8b\images_full\debug\nrf9160dk_asset_tracker_nbiot_legacy_pco_debug_2020-04-29_bc7ade8b.hexGet the JSON file from nRF Cloud
- Fill up the HWID and IMEI on your nRF Cloud to get the certification of nRF9160 DK board.
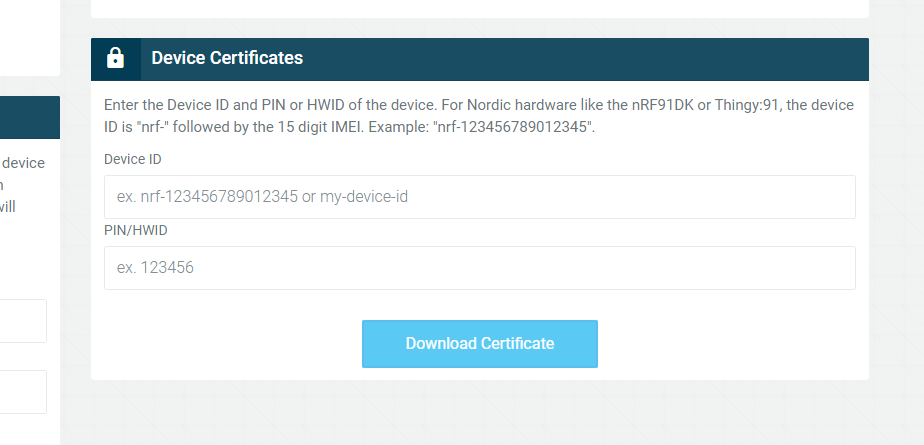
Provisioning the nRF Connect for Cloud certificate
After retrieving the certificate from nRF Connect for Cloud, you must provision it to your nRF9160 DK.Note: The application firmware on the nRF9160 DK must support long AT commands up to 3 kB to provision the certificate. If you updated the application firmware as described, this requirement is fulfilled.
Complete the following steps to provision the certificate:
- Open nRF Connect for Desktop and launch nRF Connect LTE Link Monitor.
- In the Settings pane on the right, deselect the check box for Automatic requests.
- If you have already inserted the Subscriber Identity Module (SIM) card into your Development Kit (DK), remove it before you continue.
- Connect the nRF9160 DK to the computer with a USB cable and turn it on.In the navigation bar, No devices available changes to Select device.
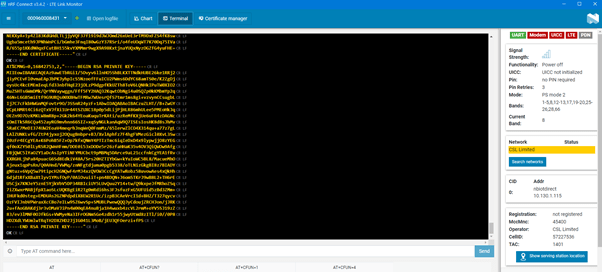
- Click Terminal in the navigation bar to switch to the terminal view.
- Enter AT+CFUN=4 in the AT command text field and click Send.This AT command puts the modem to offline state.
- Enter AT+CFUN? in the AT command text field and click Send.This AT command returns the state of the modem.The command should return +CFUN: 4, which indicates that the modem is in offline state. If it returns a different value, repeat the previous step.
- Click Certificate manager in the navigation bar to switch to the certificate manager view.
- Click Load from JSON and select the *.cert.json file that you downloaded from nRF Connect for Cloud.You can also drag and drop the file onto the GUI.
- Ensure that the Security tag is set to 16842753, which is the security tag for nRF Connect for Cloud credentials.
- Click Update certificates.The log message “Certificate update completed” indicates that the certificate was provisioned successfully.If you encounter any errors, switch to the terminal view and check the output of the AT commands that were sent to the nRF9160 DK modem.
Note: If you had connected your nRF9160 DK to nRF Connect for Cloud before, you must delete the device there after provisioning the certificate. To do so, open the entry for your device from the Devices view, click Configure, and select Delete Device. Then, add the nRF9160 DK again as described in Connecting the DK to nRF Connect for Cloud.
Switch off the MODEM

Program the Certification on the NRF9160 DK board.
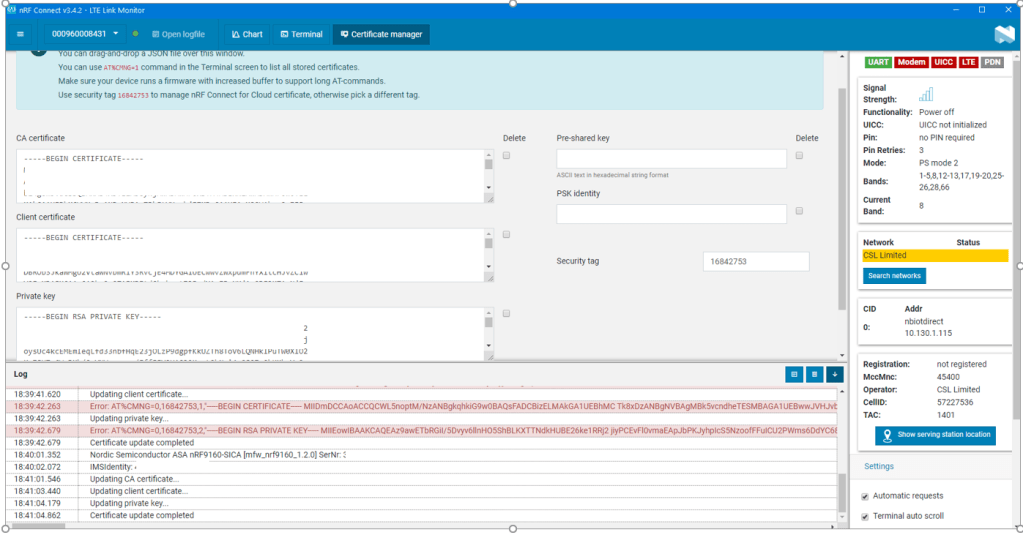
After finish, it would show the certification complete on the terminal.
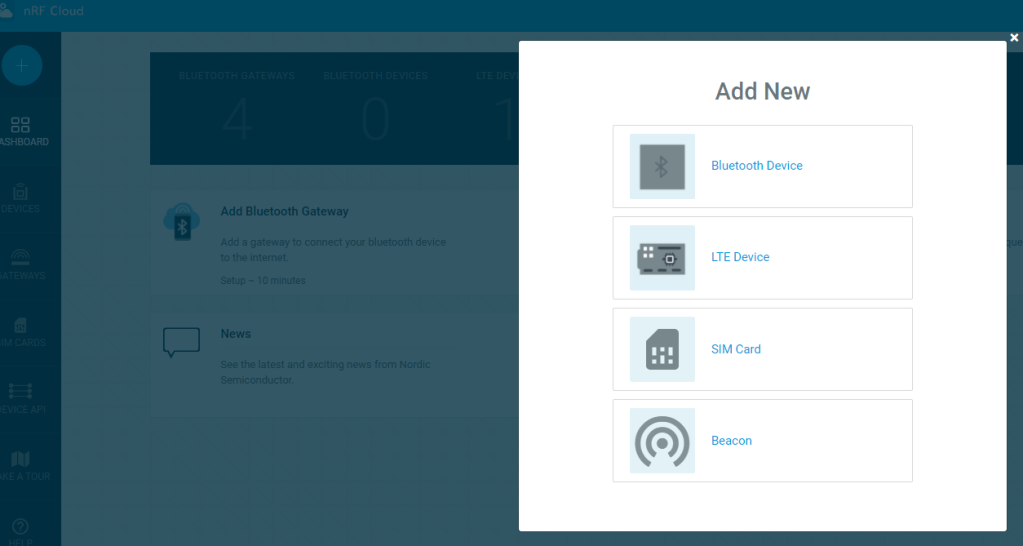
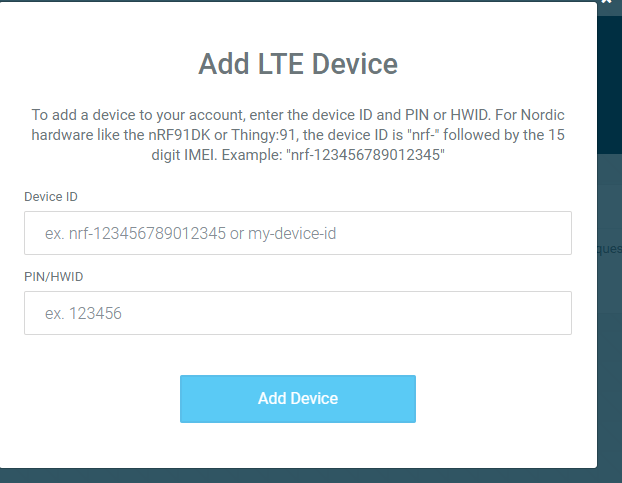
Add the nRF9160 DK on your nRFCloud account
Select the LTE device
Fill up the Device ID (IMEI) and HWID on the NRF cloud.


Insightful piece! The infographics were very helpful.
LikeLike